The OS market leader wants to imitate the success of XP and Windows 7 with their new offering. Its predecessor Windows 10, was a debatable success before the debacle of Windows 8 and 8.1. Something that Microsoft clearly wants to forget in recent times. Until recently, the Windows 11 ISO was available in beta through the Microsoft Developer network. You had to create an account, then find the download link for Windows 11 to download the files. That’s not the case anymore; you can download and install Windows 11 through the official public links.
Download Windows 11 ISO file directly
Update – The direct download link for Windows 11 ISO has been fixed.
Download Windows 11 ISO file directly Download Windows 11 ISO file Official – Microsoft Site Install Windows 11 by disabling TPM 2.0 Check1. Making Bootable Windows 11 Disc2. Clean Install Windows 11 using ISO FileDownload Windows 11 ISO Image without TPMTop Windows 11 featuresUpdate Windows 11 to 22H2 Version
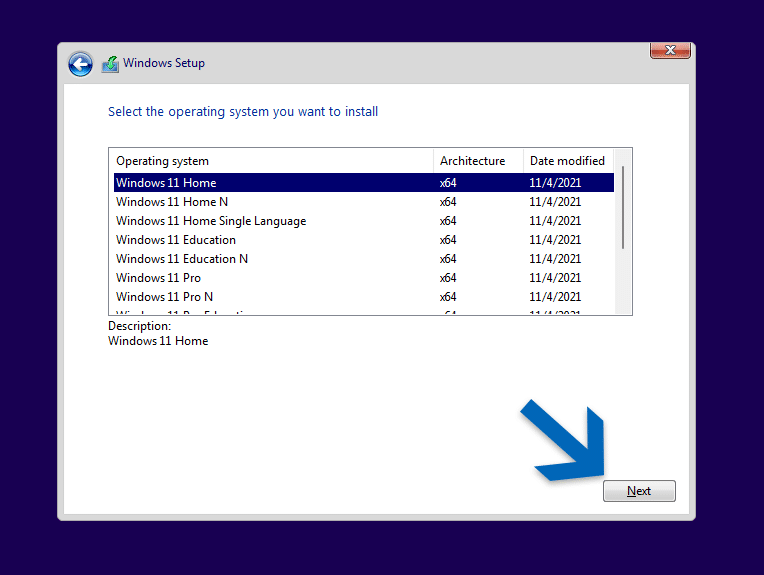
The Windows 11 ISO contains the following versions, which you will get the chance to select during installation.
Windows 11 Home Windows 11 Pro Windows 11 Education Windows 11 Enterprise Windows 11 Pro Education Windows 11 Pro for Workstations Windows 11 Mixed Reality
Download Windows 11 ISO file Official – Microsoft Site
Here is how you download Windows 11 directly from the official website. The official link is active for a period of 24 hours, so we are not going to go there. Download the ISO file by yourself in 4 easy steps that barely take a minute.
Head to the official Windows 11 page.
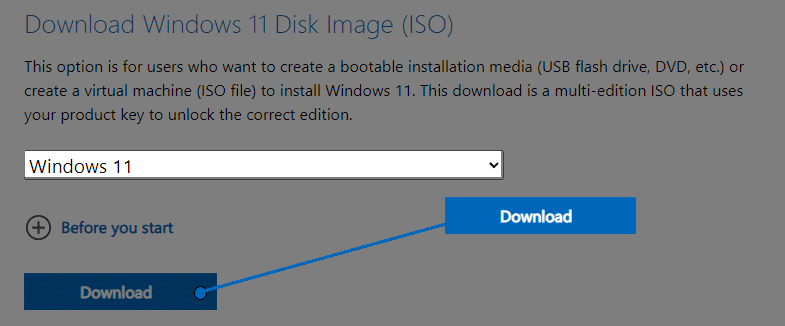
Scroll down to the Download Windows 11 Disk Image (ISO) section, which is third in order from the top.
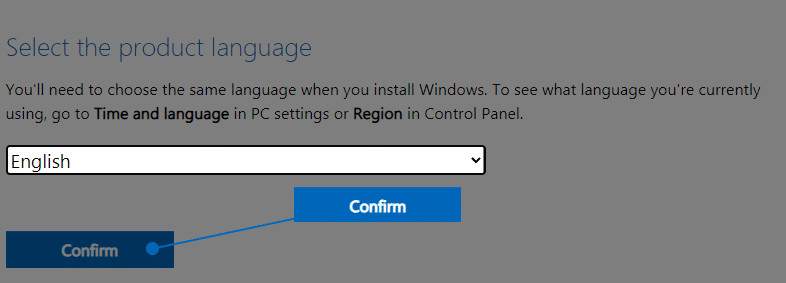
This will take you a few inches downwards to the Select Product Language section. Do as it says and select the language for your Windows 11 package. We selected English as the language from the dropdown menu and clicked on the confirm button.
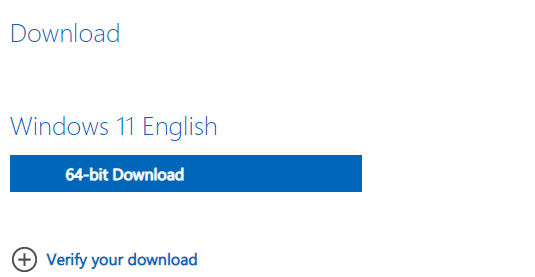
A download button appears in the next section. Click on the 64-bit Download button, and it will start the download on your browser. Or in the download manager if it is configured to catch the incoming links. Thing to keep In Mind – As of now, Windows 11 is only available in 64-bit, but the 32-bit apps will still run without a problem.
Also Read – Best Windows 11 Themes
Install Windows 11 by disabling TPM 2.0 Check
1. Making Bootable Windows 11 Disc
Bypass the This PC can’t run Windows 11 error while installing Windows 11 by disabling TPM 2.0. Microsoft is augmenting security on a hardware level by making TPM(Trusted Platform Module) 2.0 compulsory. Did You Know – TPM is essentially a cryptogenic security measure, implemented on the hardware through a chip. You can find it on your motherboard from the manual or the specification page on the manufacturer’s site. We will use this bootable creator application called Rufus, which will create a bootable Windows 11 bypassing the TPM 2.0 check.
Plug in a flash drive with 8 GB or more space and launch Rufus.
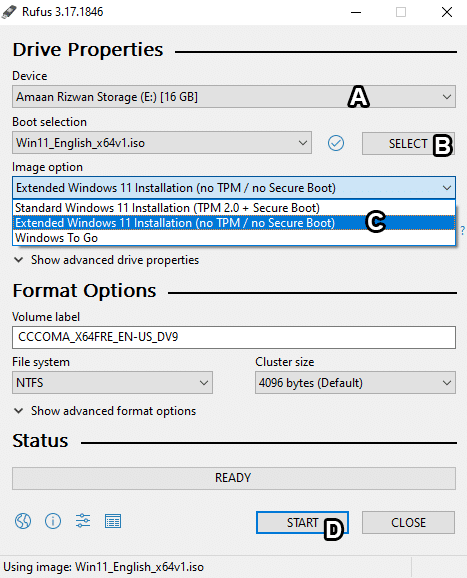
Here, we take one step at a time, explaining as we go forward. Your plugged-in flash drive will appear in Device, as denoted by A. If you have multiple external storage plugged in, make sure to select the correct one from the drop-down list.
Click on the select button, as denoted by B, and locate the Windows 11 ISO image we downloaded earlier.
After that, move to the Image option and select Extended Windows 11 Installation(no TPM/ no Secure Boot). This will ensure that Windows 11 can be installed without TPM. Optional – You can give a name to your flash drive through the Volume Label box.
Now go all the way down of the window and click on the Start button. It will take a couple of minutes to create Windows 11 bootable. Then you can learn to clean Install Windows 11 in the next section.
2. Clean Install Windows 11 using ISO File
Boot up your PC from a USB drive using the boot menu. To access the menu, you need to press the boot menu key on the keyboard. Laptops Desktops
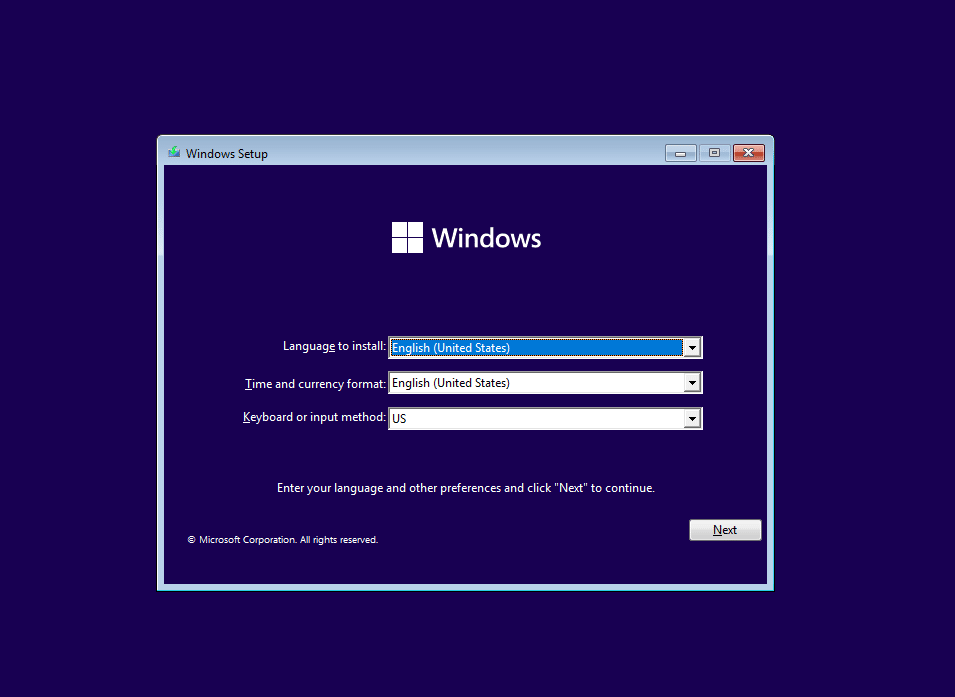
On booting from a bootable Windows 11 media, you will see the welcome screen. Select your preferred language, time and currency format followed in your region, and keyboard input method. Click on the Next button to continue to the next page.
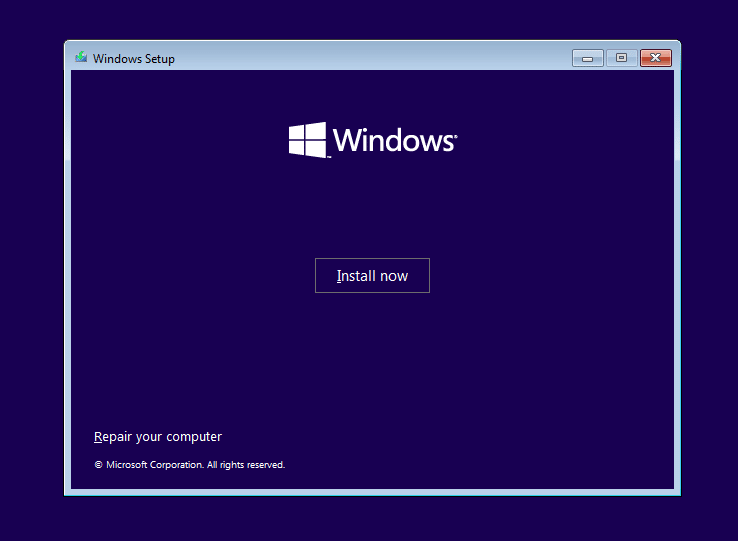
Now, the Install Now button will appear on the screen. Click on the button to proceed to the next step.
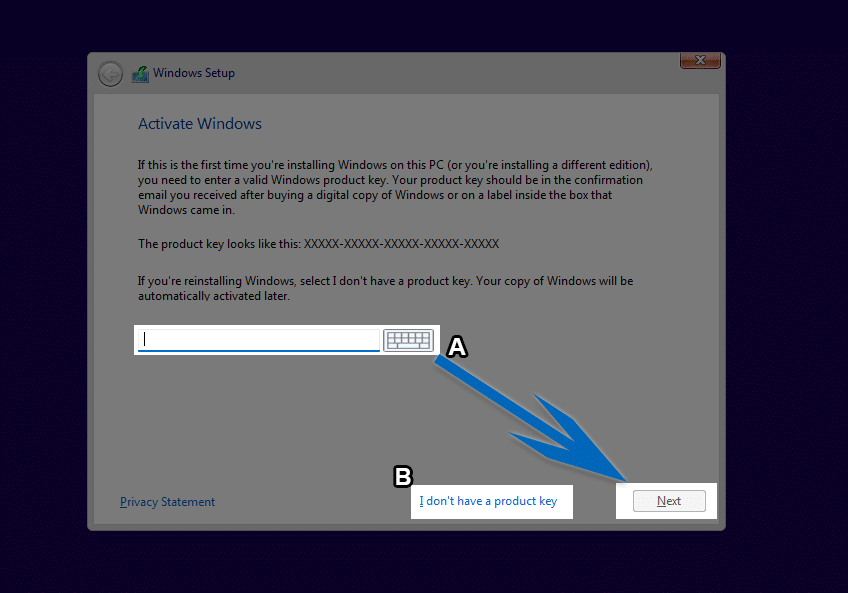
If you have the Windows 11 key, enter it as denoted by A. Then click on the Next button to proceed. On the other hand, if you want to try the OS, click on I don’t have a product key, as denoted by B.
It’s time we select the Windows 11 version to install. For personal usage, you can go ahead with the Windows 11 Home.
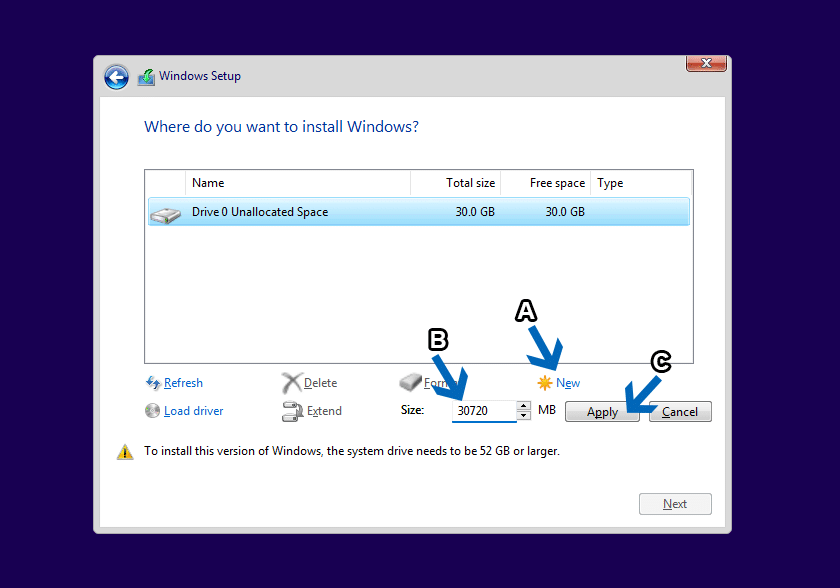
On the next page, we will create a new partition for Windows 11 installation. You can skip to the next step if there is a partition already on your hard disk.
Follow the steps in chronological order to create a partition:
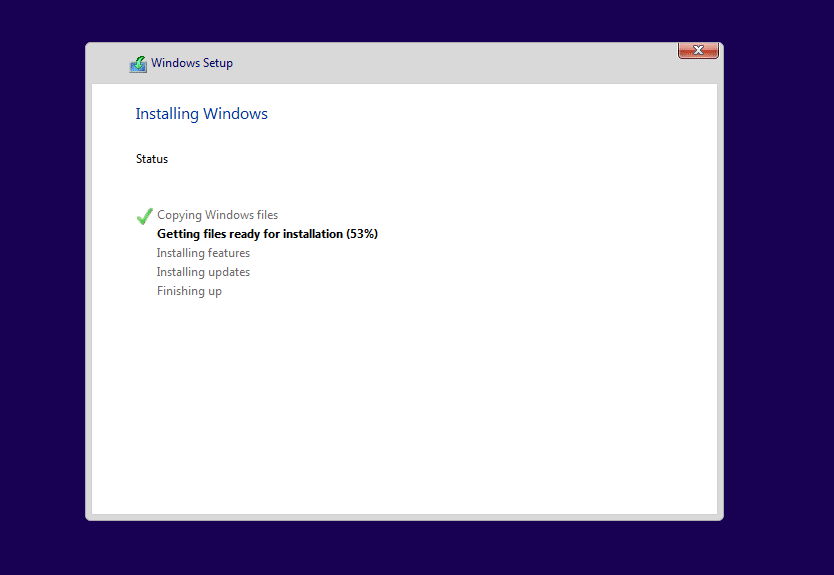
For clearing partition out of unallocated space, click on New, as denoted by A. A size dialog box will appear, as denoted by B. Set the size in MBs regarding the available space. Use the arrow keys or manually fill the numbers. Click on Apply, and a partition for Windows 11 will be created. Now click on Next, and the installation will begin.
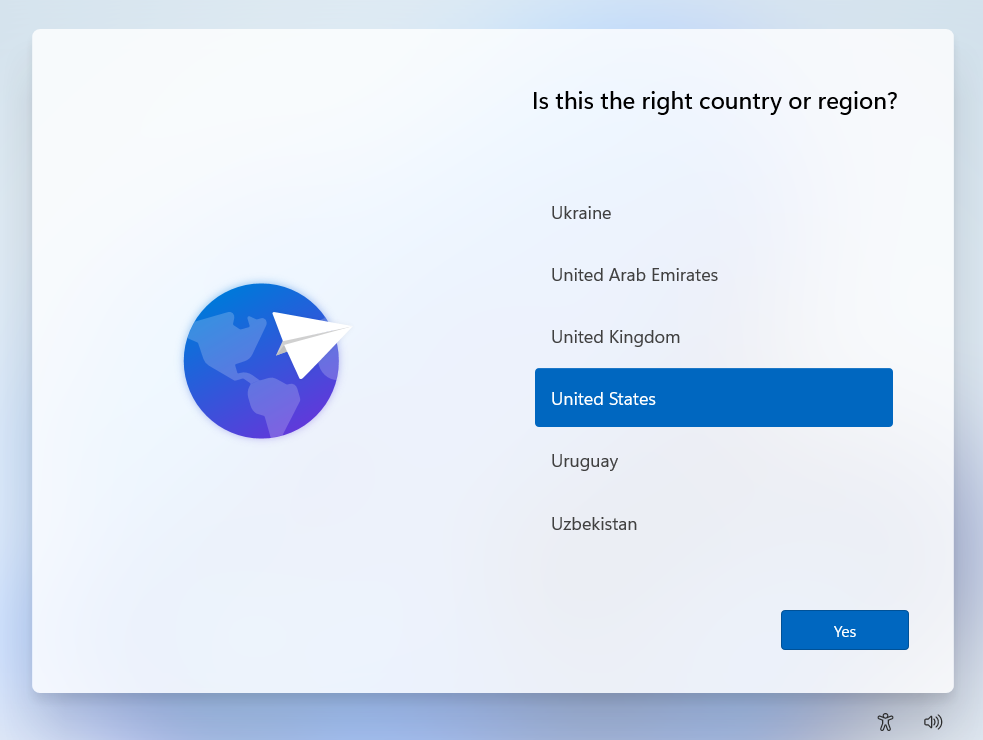
Windows 11 has been installed now. Time to set a few things before using the OS. Select your Country and click on the Yes button to proceed.
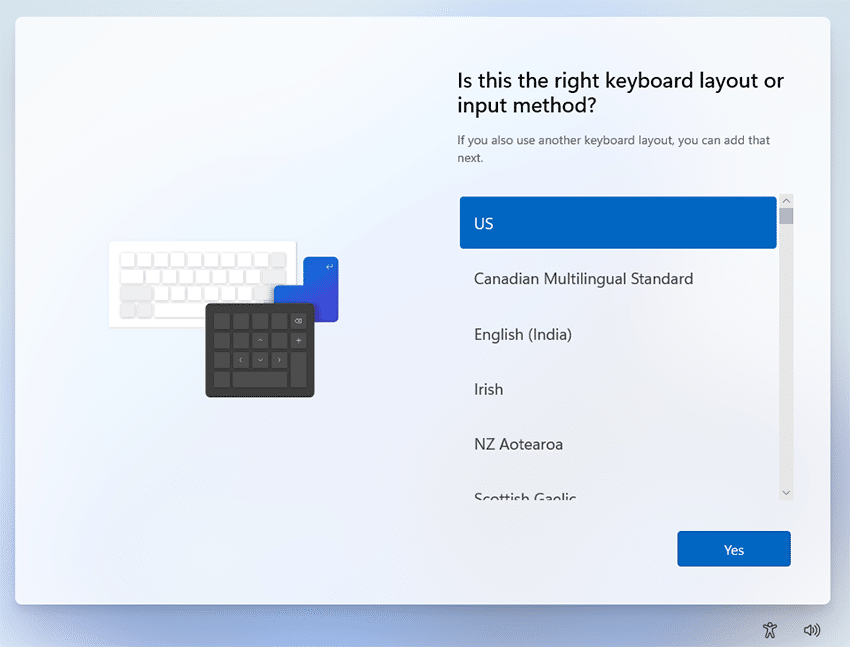
Then, select the keyboard or input layout for your Windows 11 usage. It will prompt for a secondary layout, which you can skip for now.
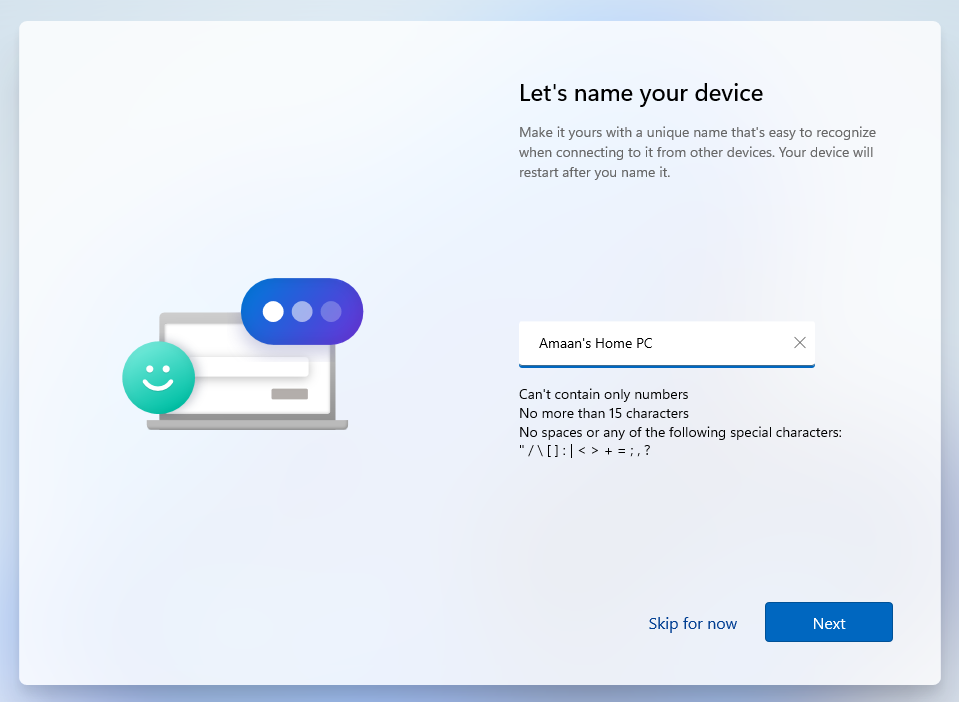
It’s time to provide a name to your PC. This will appear as your computer’s ID on WiFi, LAN, and other connected devices.
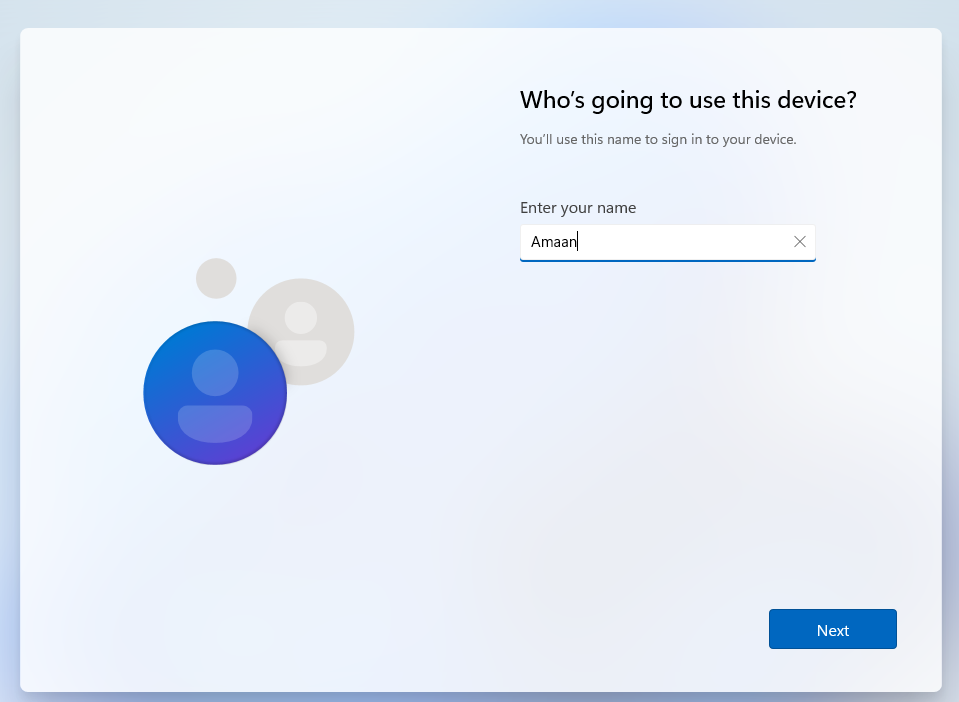
After a brief moment of setting up, Windows will ask your name for creating a user account. The name can be anything, a nickname, moniker, or something random that you wish to display on the user account. It can always be changed later on.
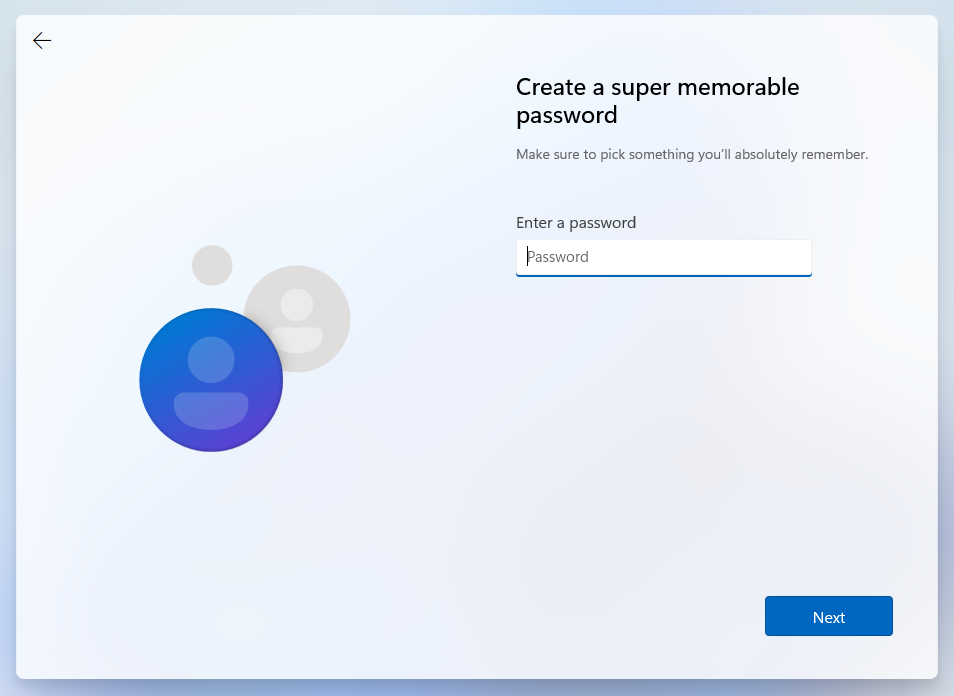
Once you are done creating the account, we set a password for the account. It will be needed for logging into the computer.
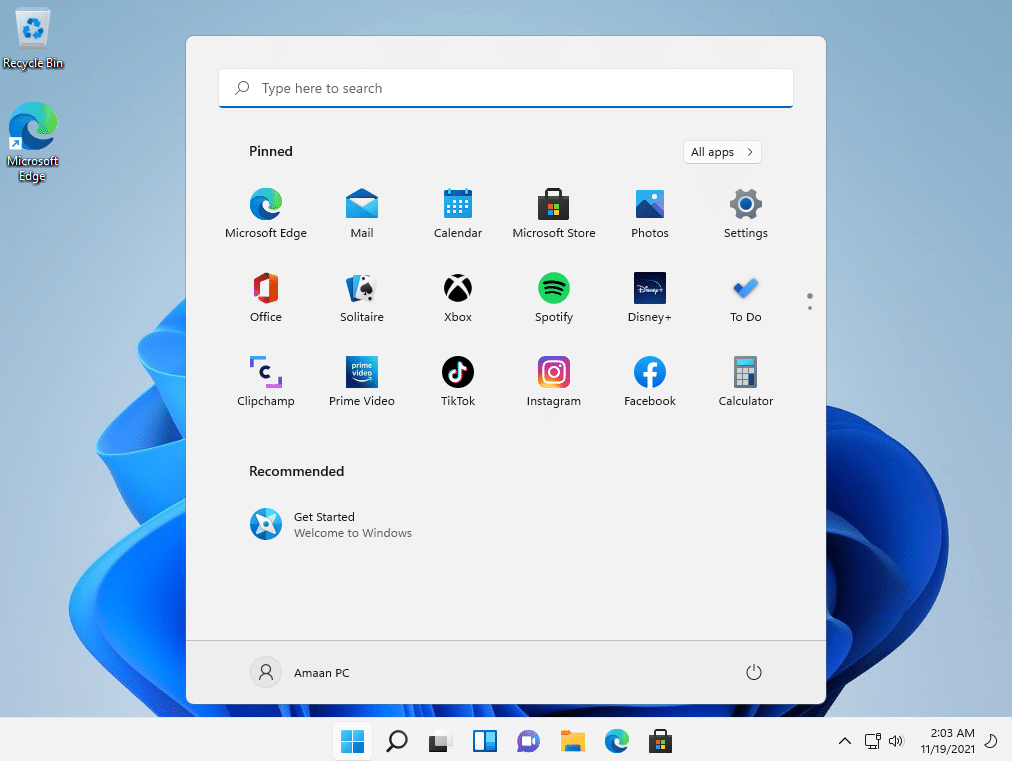
This will be followed by three security questions. They will come in handy in scenarios where you forget the login password for your user account. Make sure to remember the questions and their answers. We also recommend keeping a note and storing them in a safe place. You have successfully installed Windows 11 on your PC. Explore what’s new features and see what has changed.
Hold up; we are not done yet. Rufus is good if you want to create a bootable Windows 11 ISO image. However, if you want to install directly by mounting the ISO image to the computer, the TPM 2.0 requirement may hinder your plans.
Download Windows 11 ISO Image without TPM
Windows 11 conducts a TPM 2.0 check, ensuring that the TPM module is present physically on your motherboard or not. You can disable TPM 2.0 using Universal MediaCreationTool, a free utility tool to download Windows 11 ISO from the official servers.
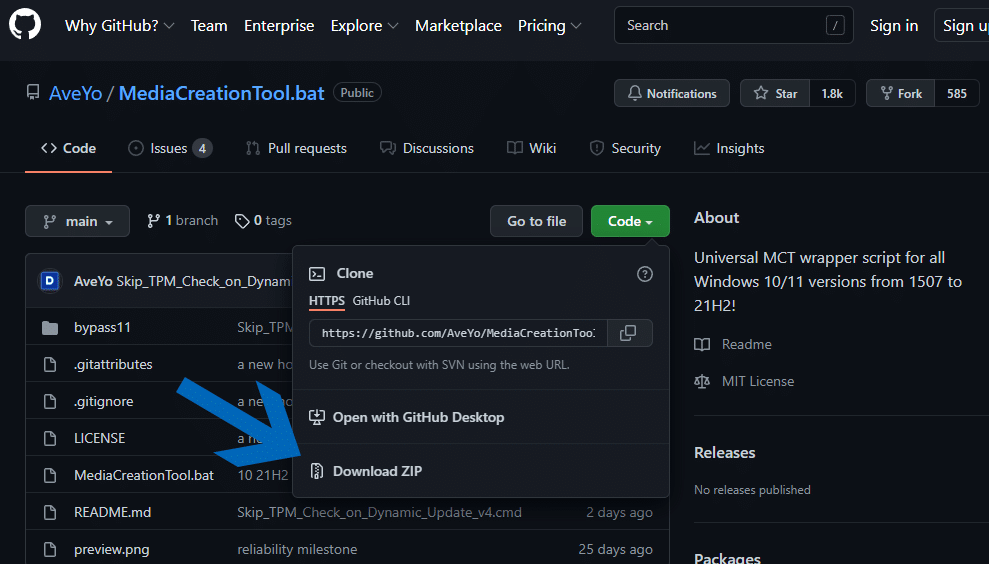
Head to the Universal MediaCreation Tool’s page and click on the code to find the Download Zip button.
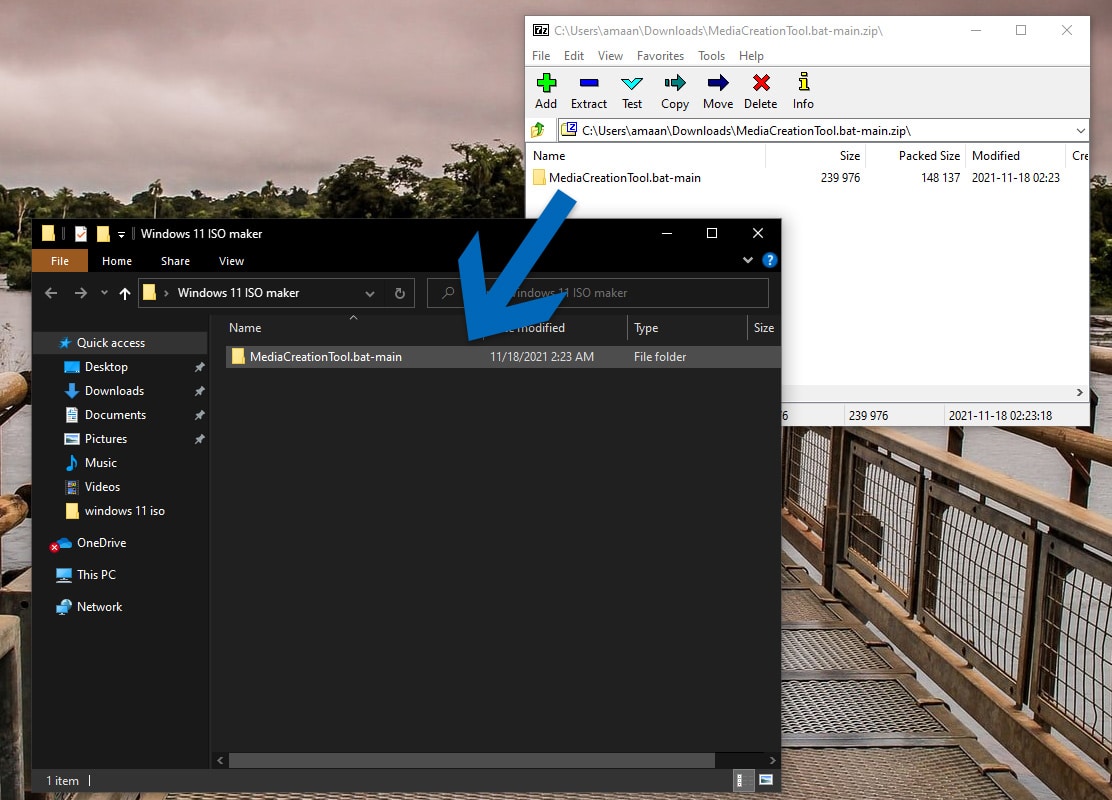
Extract the entire MediaCreationTool.bat-main into a folder
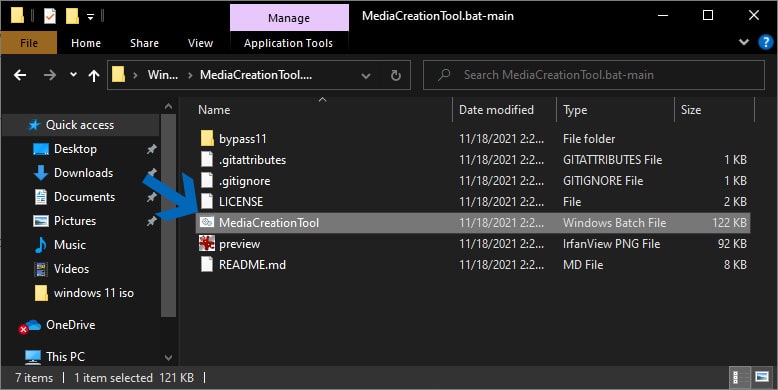
Head to the extracted folder, and launch the MediaCreationTool BAT file.
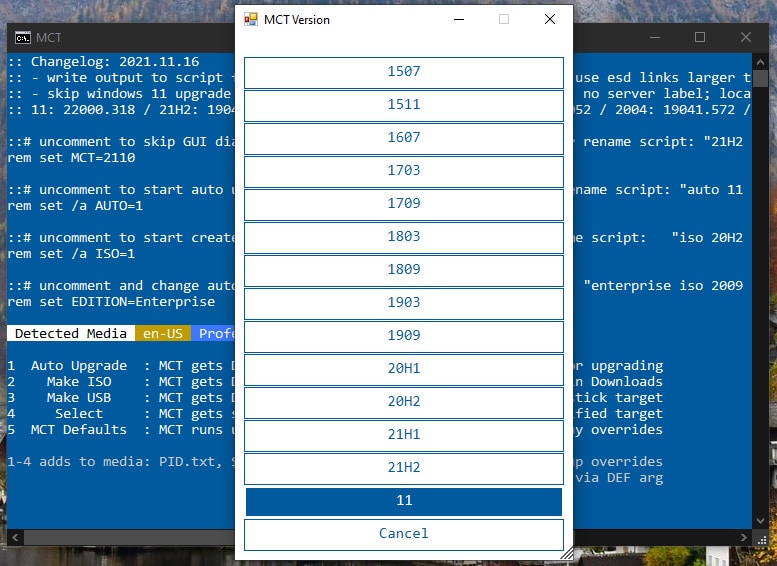
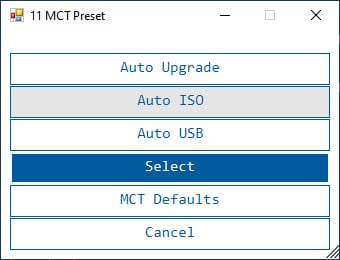
A command prompt will run for a few seconds before the MCT Version window will appear. Select 11, which is at the bottom of the options.
In the next prompt, select the Auto ISO option from the menu. Update – We have replaced the Make ISO option with Auto ISO as the updated media creation tool has the auto option.
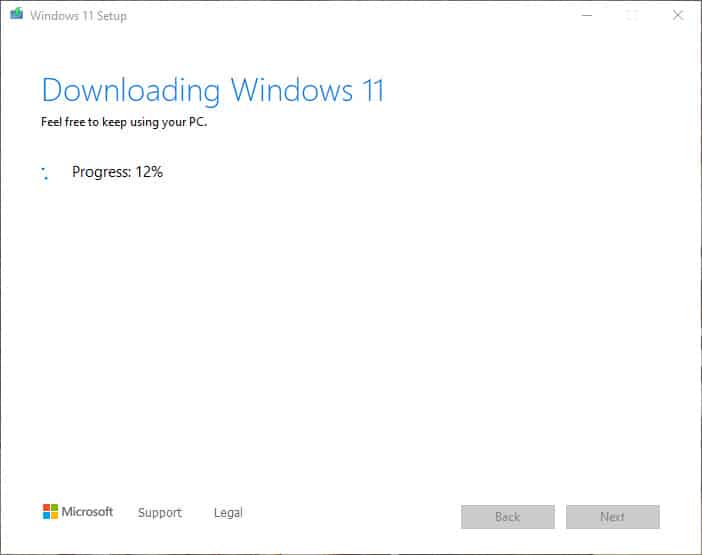
Your work is done; the program will download Windows 11 ISO for you.
It will appear in the Media Creation folder. You can also use the B method with Rufus for creating a bootable Windows 11 USB drive. Windows 11 Minimum Requirements
Top Windows 11 features
Update Windows 11 to 22H2 Version
If you are already using Windows 11 and want to update to the latest version Windows 11 22H2. Then follow the steps: Over to You Now you can download Windows 11 ISO images without involving complex command prompt-based processes. We discussed two ways to install Windows 11 without TPM – Through Rufus and another by Universal Media Creation Tool, which directly downloaded Windows 11 from the official servers. You can also mount the Windows 11 ISO directly and start installing it on your PC itself without requiring a boot.
